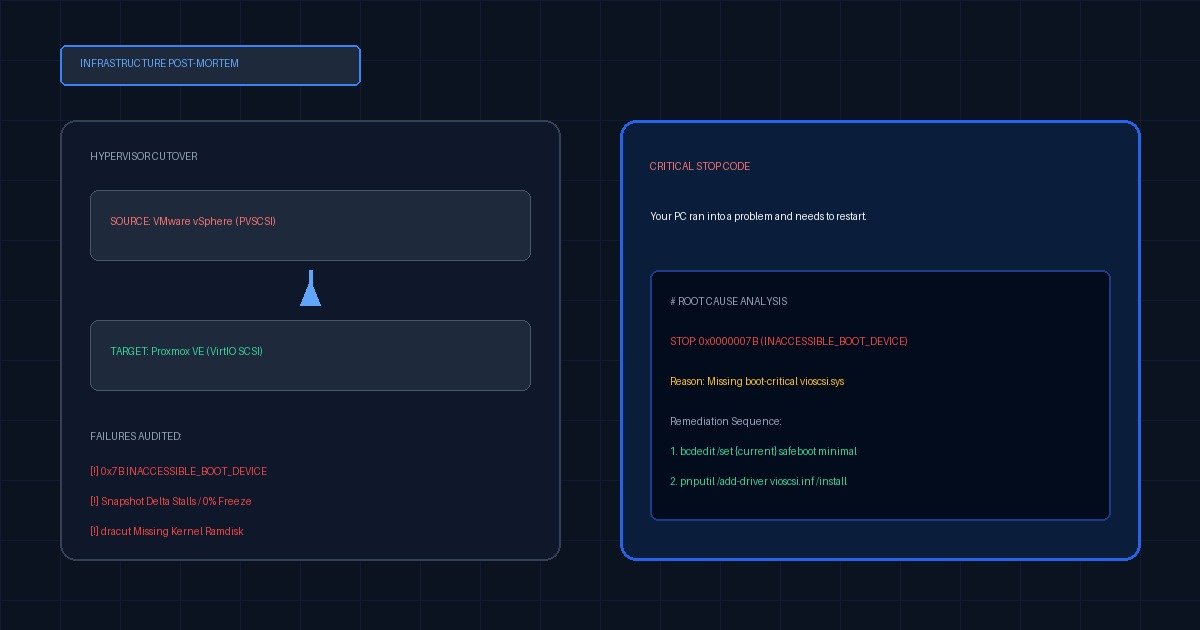
Most VMware-to-Proxmox migrations fail after the import, not during it. The five recurring causes are: the PVSCSI-to-VirtIO controller change (fix with bcdedit safe boot before switching), snapshots left on the source VM, un-regenerated dracut on RHEL-family guests, thick provisioning that never converts, and mounted ISOs that cannot import at all.
The import wizard is the easy part. Proxmox VE ships a working ESXi importer, it connects, it enumerates your VMs, and it copies disks. Every published migration guide walks you through that wizard and stops there, because that is where the happy path ends.
What those guides do not tell you is that a successful import is not a successful migration. The guest still has to boot. And the reason it usually does not is that the import changed the storage controller underneath an operating system that was never told about it.
This article covers the five failure modes that appear repeatedly on the Proxmox support forum, in the order you are likely to hit them. Each one gets a direct answer first and the commands second.
- Changing the SCSI controller from VMware PVSCSI to VirtIO SCSI Single triggers
INACCESSIBLE_BOOT_DEVICE(0x7B) on Windows Server 2016 and later. Runbcdedit /set {current} safeboot minimalbefore changing the controller, boot once into safe mode, install the driver, then remove the flag. - A migration task that shows network traffic but never completes — even on a 20 GB VMDK — is almost always a snapshot still present on the source VM. Consolidate snapshots before you start, and confirm the “Consolidation Needed” flag has cleared.
- Rocky Linux and RHEL 8.10+ guests import without any error and then come up unable to see their root filesystem. The initramfs has no VirtIO modules. Regenerate dracut with those drivers explicitly added, on the source, before you migrate.
- Snapshots and mounted ISOs cannot be imported at all. This is a documented limitation of the import tooling, not a bug you can work around, and no migration guide states it up front.
- Thick-to-thin conversion does not happen automatically on import, even when you import as raw and convert to qcow2 afterwards. Zero the free space inside the guest first or plan your storage on the assumption that 500 GB allocated means 500 GB consumed.
Why does my Windows VM blue-screen after migrating to Proxmox?
Because Windows cannot load a storage driver it has never seen. On ESXi the boot disk sat behind a VMware PVSCSI controller; on Proxmox it sits behind VirtIO SCSI. The VirtIO driver is not present in the boot-critical driver set, so Windows Server 2016, 2019 and 2022 stop at INACCESSIBLE_BOOT_DEVICE, bugcheck 0x0000007B, before reaching the login screen. The disk is fine. The driver is missing.
This is the single most reported VMware-to-Proxmox failure, and it originates in a thread on the Proxmox forum where an operator changed PVSCSI to VirtIO SCSI Single and watched a working Windows guest blue-screen on the next boot.
The fix, in the order that actually works
Do this on the source VM, while it is still running on ESXi. Every step after the migration is recovery; this is prevention.
# 1. On the still-running Windows guest, before you shut it down for migration.
#    Safe boot forces Windows to enumerate and load drivers generically on the
#    next start instead of trusting its cached boot-critical driver set.
bcdedit /set {current} safeboot minimal

# 2. Shut down cleanly. Do NOT hibernate, do NOT use fast startup.
shutdown /s /t 0
Now migrate the VM. In the Proxmox hardware tab, set the SCSI controller to VirtIO SCSI Single, attach the virtio-win ISO to the CD-ROM drive, and start the guest. It will come up in safe mode, because that is what you told it to do.
# 3. Inside safe mode, install the VirtIO storage driver from the mounted ISO.
#    Device Manager will work, but pnputil is faster and scriptable:
pnputil /add-driver D:\vioscsi\2k22\amd64\vioscsi.inf /install

# 4. Remove the safe boot flag and reboot normally.
bcdedit /deletevalue {current} safeboot
shutdown /r /t 0
The guest now boots normally on VirtIO SCSI.
If you already migrated and are staring at the blue screen, you have two routes. The reliable one: change the controller back to SATA or IDE in the Proxmox hardware tab, boot the guest, install the VirtIO drivers from the ISO, add a small second disk on a VirtIO SCSI controller so the driver binds and registers, shut down, then switch the boot disk to VirtIO SCSI. The faster one, if the guest will not boot on SATA either: boot the Windows installation media, open a recovery command prompt, and use dism to inject the driver into the offline image.
:: Offline driver injection from Windows recovery. Identify the guest volume
:: first with diskpart — it is frequently NOT C: inside WinRE.
dism /image:D:\ /add-driver /driver:E:\vioscsi\2k22\amd64\vioscsi.inf
One more thing that catches people. Uninstall VMware Tools before you migrate, not after. On Proxmox it has nothing to talk to, it holds device claims, and uninstalling it from a guest that has already moved is significantly more annoying than uninstalling it from one that has not.
Why is my VMware migration running forever and never finishing?
Because there is a snapshot on the source VM. The import reads the disk chain through the ESXi API, and a VM with an unconsolidated snapshot presents a delta-disk chain rather than a single flat VMDK. The task shows network activity and a progress bar that advances and then stalls — commonly on disks as small as 20 GB, which is the tell. Size is not the problem. Chain depth is. This behaviour is reported repeatedly in Proxmox migration issue reports.
The fix
In vCenter or the ESXi host client, open Snapshot Manager for the VM and delete all snapshots, then wait for consolidation to finish. Deleting the snapshot entries is not the same as consolidating the disks — the VM summary page will raise a “Virtual machine disks consolidation is needed” warning if work remains. Clear that warning before you touch the importer.
vCenter → VM → Snapshots → Delete All Snapshots
vCenter → VM → Actions → Snapshots → Consolidate
Confirm: VM Summary shows no "Consolidation Needed" flag
Verify from the datastore browser that the VM folder now contains only vmname.vmdk and vmname-flat.vmdk, with no -000001.vmdk delta files remaining. If deltas are still present, consolidation did not complete — usually because a backup product still holds a lock on the disk. Stop the backup job, then consolidate again.
Two adjacent causes worth ruling out while you are in there. First, an importer task that stalls at exactly 0% has not started transferring at all and is a connectivity or credentials problem, not a snapshot problem. Second, if the source VM is powered on during import, you are copying a moving target; Proxmox will let you do it, and the result is a crash-consistent disk that may or may not boot. Shut the guest down cleanly first.
Know what “slow” actually looks like before you call it stuck. The useful question is not how long the task has been running but how many bytes have moved in the last minute, and the importer’s progress bar is a poor place to read that. Watch the target instead — disk utilisation on the destination storage, or interface counters on the node — and compare against the narrowest link in the path. A 500 GB disk crossing a 1 GbE management network cannot finish in under about eighty minutes even at full line rate, and management interfaces are rarely at line rate. A task that looks hung for two hours on a large disk over a slow link is behaving correctly; a 20 GB disk that has moved nothing in ten minutes is not. Establish that baseline first, because the most expensive mistake here is cancelling a migration that was working and restarting it from zero. If throughput is genuinely the constraint rather than a snapshot chain, move the import traffic onto a dedicated storage network rather than the management interface, and run large VMs one at a time — parallel imports across a shared link do not finish sooner, they just all finish late together.
Why can’t my Rocky/RHEL VM see its partitions after import?
Because the initramfs does not contain the VirtIO storage modules. Red Hat-family guests build a minimal initramfs containing only the drivers needed for the hardware present at build time — which on ESXi meant PVSCSI, not VirtIO. The import reports success, the disk is intact, and the guest drops to a dracut emergency shell reporting that it cannot find the root device. The partitions are there. Nothing can read them. The same pattern is tracked in threads on the new migration tool.
The fix
On the source guest, before migration, regenerate every initramfs with the VirtIO drivers explicitly added:
# Run on the source VM while it is still on ESXi.
dracut --regenerate-all --force \
  --add-drivers "virtio virtio_pci virtio_blk virtio_scsi virtio_net virtio_ring"

# Confirm the modules actually landed in the image:
lsinitrd /boot/initramfs-$(uname -r).img | grep -i virtio
If that grep returns nothing, the regeneration did not take and the guest will not boot after migration. Fix it now, on a machine that still boots.
Recovering a guest that has already moved. Boot the VM from a Rocky or RHEL live/rescue ISO, mount the root filesystem, and chroot into it:
mount /dev/mapper/rl-root /mnt
mount /dev/vda1 /mnt/boot          # adjust for your layout
for d in dev proc sys run; do mount --bind /$d /mnt/$d; done
chroot /mnt

dracut --regenerate-all --force --add-drivers "virtio virtio_pci virtio_blk virtio_scsi"
grub2-mkconfig -o /boot/grub2/grub.cfg
exit && reboot
Check /etc/fstab while you are in there. If it references devices by /dev/sdX rather than by UUID=, the rename from sda to vda will break mounts even after dracut is correct. Convert to UUIDs before migrating.
And check your network interface name. ESXi presented ens192; VirtIO presents ens18. A NetworkManager connection or netplan file pinned to the old name leaves you with a guest that boots perfectly and has no network — which looks like a completely different problem and wastes an hour.
Why didn’t my thick-provisioned disk become thin?
Because the import copies allocated blocks, and a thick-provisioned VMDK has allocated all of them. Converting to qcow2 afterwards does not help: the zeroes were already written, so the converter faithfully copies zeroes. A 500 GB thick disk holding 80 GB of data arrives as a 500 GB image on Proxmox. Nothing is broken. The conversion simply never had the information it needed. Operators hit this repeatedly in threads on migrating VMware VMs to Proxmox.
The fix
Zero the free space inside the guest before migrating, so the converter can recognise it as empty.
:: Windows guest — Sysinternals sdelete, zero free space on C:
sdelete64.exe -z C:
# Linux guest — write and remove a zero file, or trim if the filesystem supports it
fstrim -av # preferred, if discard is supported
dd if=/dev/zero of=/zero.fill bs=1M ; rm -f /zero.fill # fallbackThen convert with sparse output, or sparsify the image after the fact:
# Convert with sparse handling
qemu-img convert -p -O qcow2 source-flat.vmdk /var/lib/vz/images/100/vm-100-disk-0.qcow2

# Or sparsify an image that has already landed
virt-sparsify --in-place /var/lib/vz/images/100/vm-100-disk-0.qcow2
Finally, enable Discard and SSD emulation on the disk in the Proxmox hardware tab so future deletions inside the guest actually release blocks on LVM-thin, ZFS or Ceph. Without discard enabled, the disk grows monotonically forever and you will be having this conversation again in six months.
Plan capacity on the pessimistic assumption. Until you have zeroed and sparsified, budget destination storage at the allocated size of every source disk, not the used size. Running the destination pool out of space mid-import is a considerably worse afternoon than over-provisioning it.
What can’t be migrated at all?
Snapshots and mounted ISOs. Neither can be imported by the ESXi import tooling under any configuration — this is a stated limitation, not a bug with a workaround. A VM carrying snapshots must have them consolidated first, and the snapshot history itself is lost. A VM with an ISO mounted in its CD-ROM device must have that device disconnected before import, or the task fails on a datastore path it cannot resolve. Both limits surface in threads on migrating ESXi virtual machines to Proxmox VE.
Plan around it rather than fighting it:
- Snapshot history is not portable. If you need the ability to roll back to a pre-migration state, that is a backup, not a snapshot. Take a full backup of the source VM and keep the ESXi host available until the migrated guest has run in production long enough to trust.
- Disconnect every CD-ROM before import. Set the device to “no media”, or remove it entirely. Do this as a standing pre-flight step, because the failure message does not obviously say “your ISO is the problem”.
- Raw device mappings, shared VMDKs and vSphere-clustered disks need redesign, not migration. Move the data, not the disk geometry.
- Firmware type must match. A UEFI guest needs an EFI disk and OVMF on the Proxmox side; importing a UEFI VM into a SeaBIOS machine type produces a guest that boots to nothing and gives no clue why.
The guest-OS compatibility matrix
This is the table the migration guides do not publish, because writing it requires admitting that most guests do not import cleanly. The fourth column is the one to read first if you are already mid-failure.
| Guest OS | Imports cleanly | Controller pre-step required | initramfs / dracut regeneration | Known failure symptom |
|---|---|---|---|---|
| Windows Server 2016 | No | Yes — VirtIO driver injection or bcdedit safe boot | N/A | INACCESSIBLE_BOOT_DEVICE 0x0000007B at boot |
| Windows Server 2019 | No | Yes — same | N/A | INACCESSIBLE_BOOT_DEVICE 0x0000007B at boot |
| Windows Server 2022 | No | Yes — same | N/A | INACCESSIBLE_BOOT_DEVICE 0x0000007B at boot |
| Ubuntu Server LTS (20.04 / 22.04 / 24.04) | Usually | No — VirtIO is in the stock initramfs | Rarely needed | Boots but has no network: netplan pinned to ens192, VirtIO presents ens18 |
| Rocky Linux / RHEL 8.10+ / AlmaLinux | No — imports without error, then fails | No | Yes — mandatory | dracut emergency shell: “cannot find root device”; partitions invisible |
| Debian 11 / 12 | Usually | No | Occasionally, on custom or minimal kernels | Interface rename breaks /etc/network/interfaces; /dev/sdX in /etc/fstab breaks mounts |
| FreeBSD 13 / 14 | Partially | No | N/A | Drops to mountroot> prompt — device renamed da0 → vtbd0, /etc/fstab not updated |
Two patterns fall out of this table. Windows fails loudly and immediately, which is unpleasant but honest. Red Hat-family Linux fails silently at import and loudly at boot, which is worse, because the import reported success and you have already told someone the migration went fine. And the Debian/Ubuntu family mostly works, then quietly loses its network — the failure that gets misdiagnosed as a firewall problem more often than any other.
When should you not migrate off VMware?
There are three cases. If you depend on a VMware-specific capability your workload genuinely uses, such as DRS-style automated load balancing or a vendor appliance certified only on ESXi. If you hold perpetual licences and are not adding hosts or cores, since that entitlement keeps working and the migration cost may exceed the renewal cost. And if your team has no Linux operational depth, because Proxmox is Debian.
Every other article on this subject assumes the migration is happening. Here is each of the three in detail.
First: you depend on a VMware-specific capability that Proxmox has no equivalent for, and your workload genuinely uses it. DRS-style automated load balancing across a cluster is the common one. Proxmox has HA and can restart guests on a surviving node, but it does not continuously rebalance workload the way DRS does, and if your capacity planning has quietly been outsourced to DRS for five years you are about to discover that by hand. The other case is a vendor appliance certified only on ESXi. You can usually run it on Proxmox. You cannot usually get support for it, and “unsupported” is a poor position for a system you chose an appliance for in the first place.
Second: you hold perpetual licences and you are not adding hosts or cores. Perpetual entitlements bought before the subscription-only change continue to work. If your host count is stable and your core count is stable, your existing entitlement keeps running and the migration is a cost you are choosing to incur, not one being imposed. Compare the real number: the migration project cost, the retraining, the risk window, and the year of lower operational confidence — against the support-renewal cost you would otherwise pay. For a small stable estate, the arithmetic frequently favours staying. Review the breakdown on what actually changed in VMware licensing before you commit to the project.
Third: your team has no Linux operational depth. Proxmox is Debian. When it misbehaves at 2am you are reading journalctl, zpool status and corosync logs, not clicking through a support-backed GUI with a vendor on the phone. An organisation that cannot troubleshoot Debian under pressure has not reduced its risk by migrating — it has moved the risk somewhere it is less equipped to handle it. That is a training decision before it is an infrastructure decision, and the honest sequence is training first, migration second.
None of these three make Proxmox a worse platform. They make it the wrong platform for that estate, this year. The decision is about fit, not about which hypervisor wins an argument.
Your pre-migration checklist
Run this on every guest before you touch the importer. It prevents four of the five failure modes above.
- Consolidate and remove all snapshots; confirm “Consolidation Needed” has cleared
- Disconnect or remove the CD-ROM device and any mounted ISO
- Uninstall VMware Tools (Windows) or
open-vm-tools(Linux) - Windows:
bcdedit /set {current} safeboot minimal, or pre-injectvioscsi - RHEL family:
dracut --regenerate-all --force --add-drivers "virtio virtio_pci virtio_blk virtio_scsi"and verify withlsinitrd - Convert
/etc/fstabfrom/dev/sdXtoUUID= - Note the current network interface name; expect it to change to
ens18 - Zero free space inside the guest (
sdelete -z/fstrim -av) - Record source firmware type (BIOS or UEFI) and match the destination machine type
- Take a full backup and keep the ESXi host available until the guest is proven
- Shut the guest down cleanly — not suspended, not hibernated
Sources
- Proxmox VE support forum — the five threads cited inline above, which are the origin of every failure mode in this article.
- Proxmox VE official documentation — import tooling behaviour and VirtIO driver requirements.
- Broadcom KB 313548 — Counting cores for VMware Cloud Foundation and vSphere Foundation — for the licensing context in the nuance section.
- Microsoft documentation on
bcdeditsafe boot options — for the Windows fix.
2 thoughts on “Five Reasons Your VMware to Proxmox Migration Failed (and How to Fix Each)”